How to Set Up a Unique Private Domain for Your Panel (Universal Guide)
Z-IPTV
May 02 . 2026
When a panel's domain is used by many people, it can easily be blocked by ISPs (Internet Service Providers) — similar to the role of providers like China Telecom, China Mobile, or China Unicom — which ultimately makes the service unavailable. At that point, setting up a unique private domain for your panel for your customers to use becomes especially important.
So how do you purchase a domain, configure it for your panel, and offer it to your customers? This article walks you through the detailed setup steps.
Step 1
First, you need to purchase your own domain. There are many websites where you can buy domains. You can use any of them. Prices typically range from a dozen to tens of RMB.
.com domains are usually a bit more expensive, but for actual end-user usage there is no fundamental difference between expensive and cheap ones — just buy the cheapest available.
Where to buy:
In China: Alibaba Cloud (Aliyun). Buy now ==>
Internationally: NameCheap — Buy now ==>
We recommend buying on NameCheap because new-customer promos make it noticeably cheaper than Alibaba Cloud.
Once purchased, go back to your panel and retrieve your own resolution address. We'll use the strong 8K IPTV setup as the example below.
Step 2
Get your resolution domain:
Log in to the strong 8K admin backend and find My Service -> My Hosts
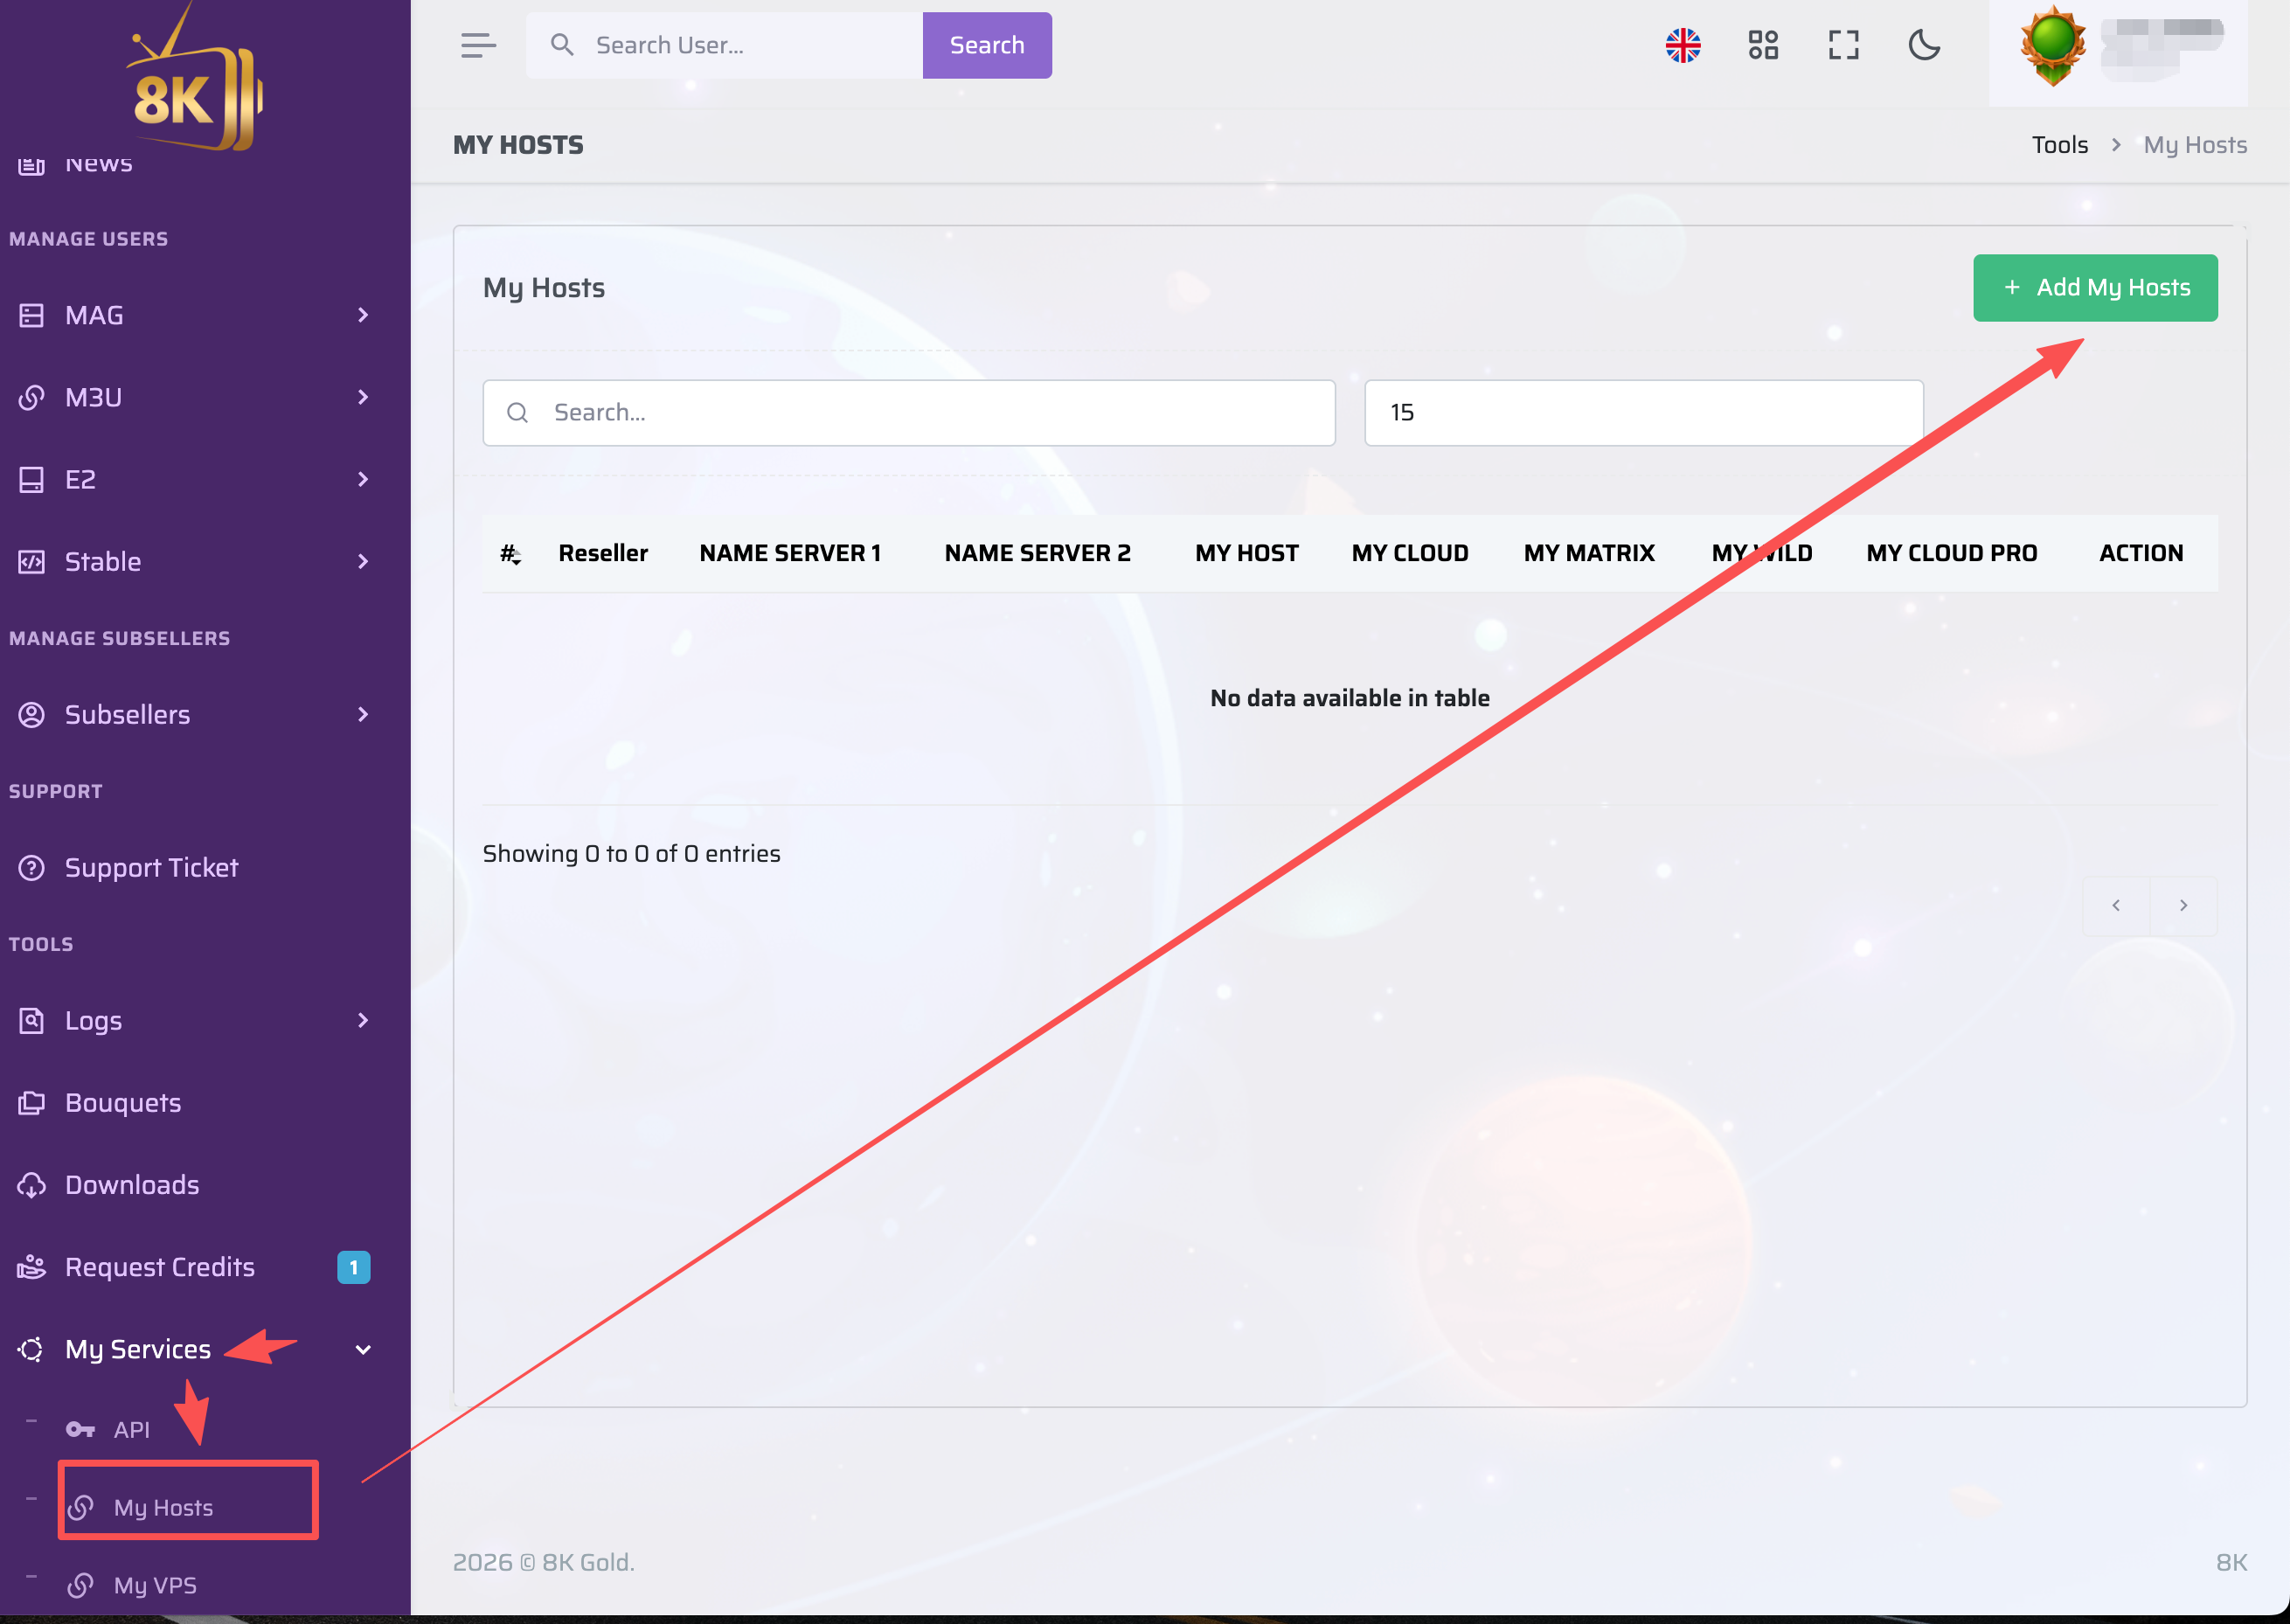
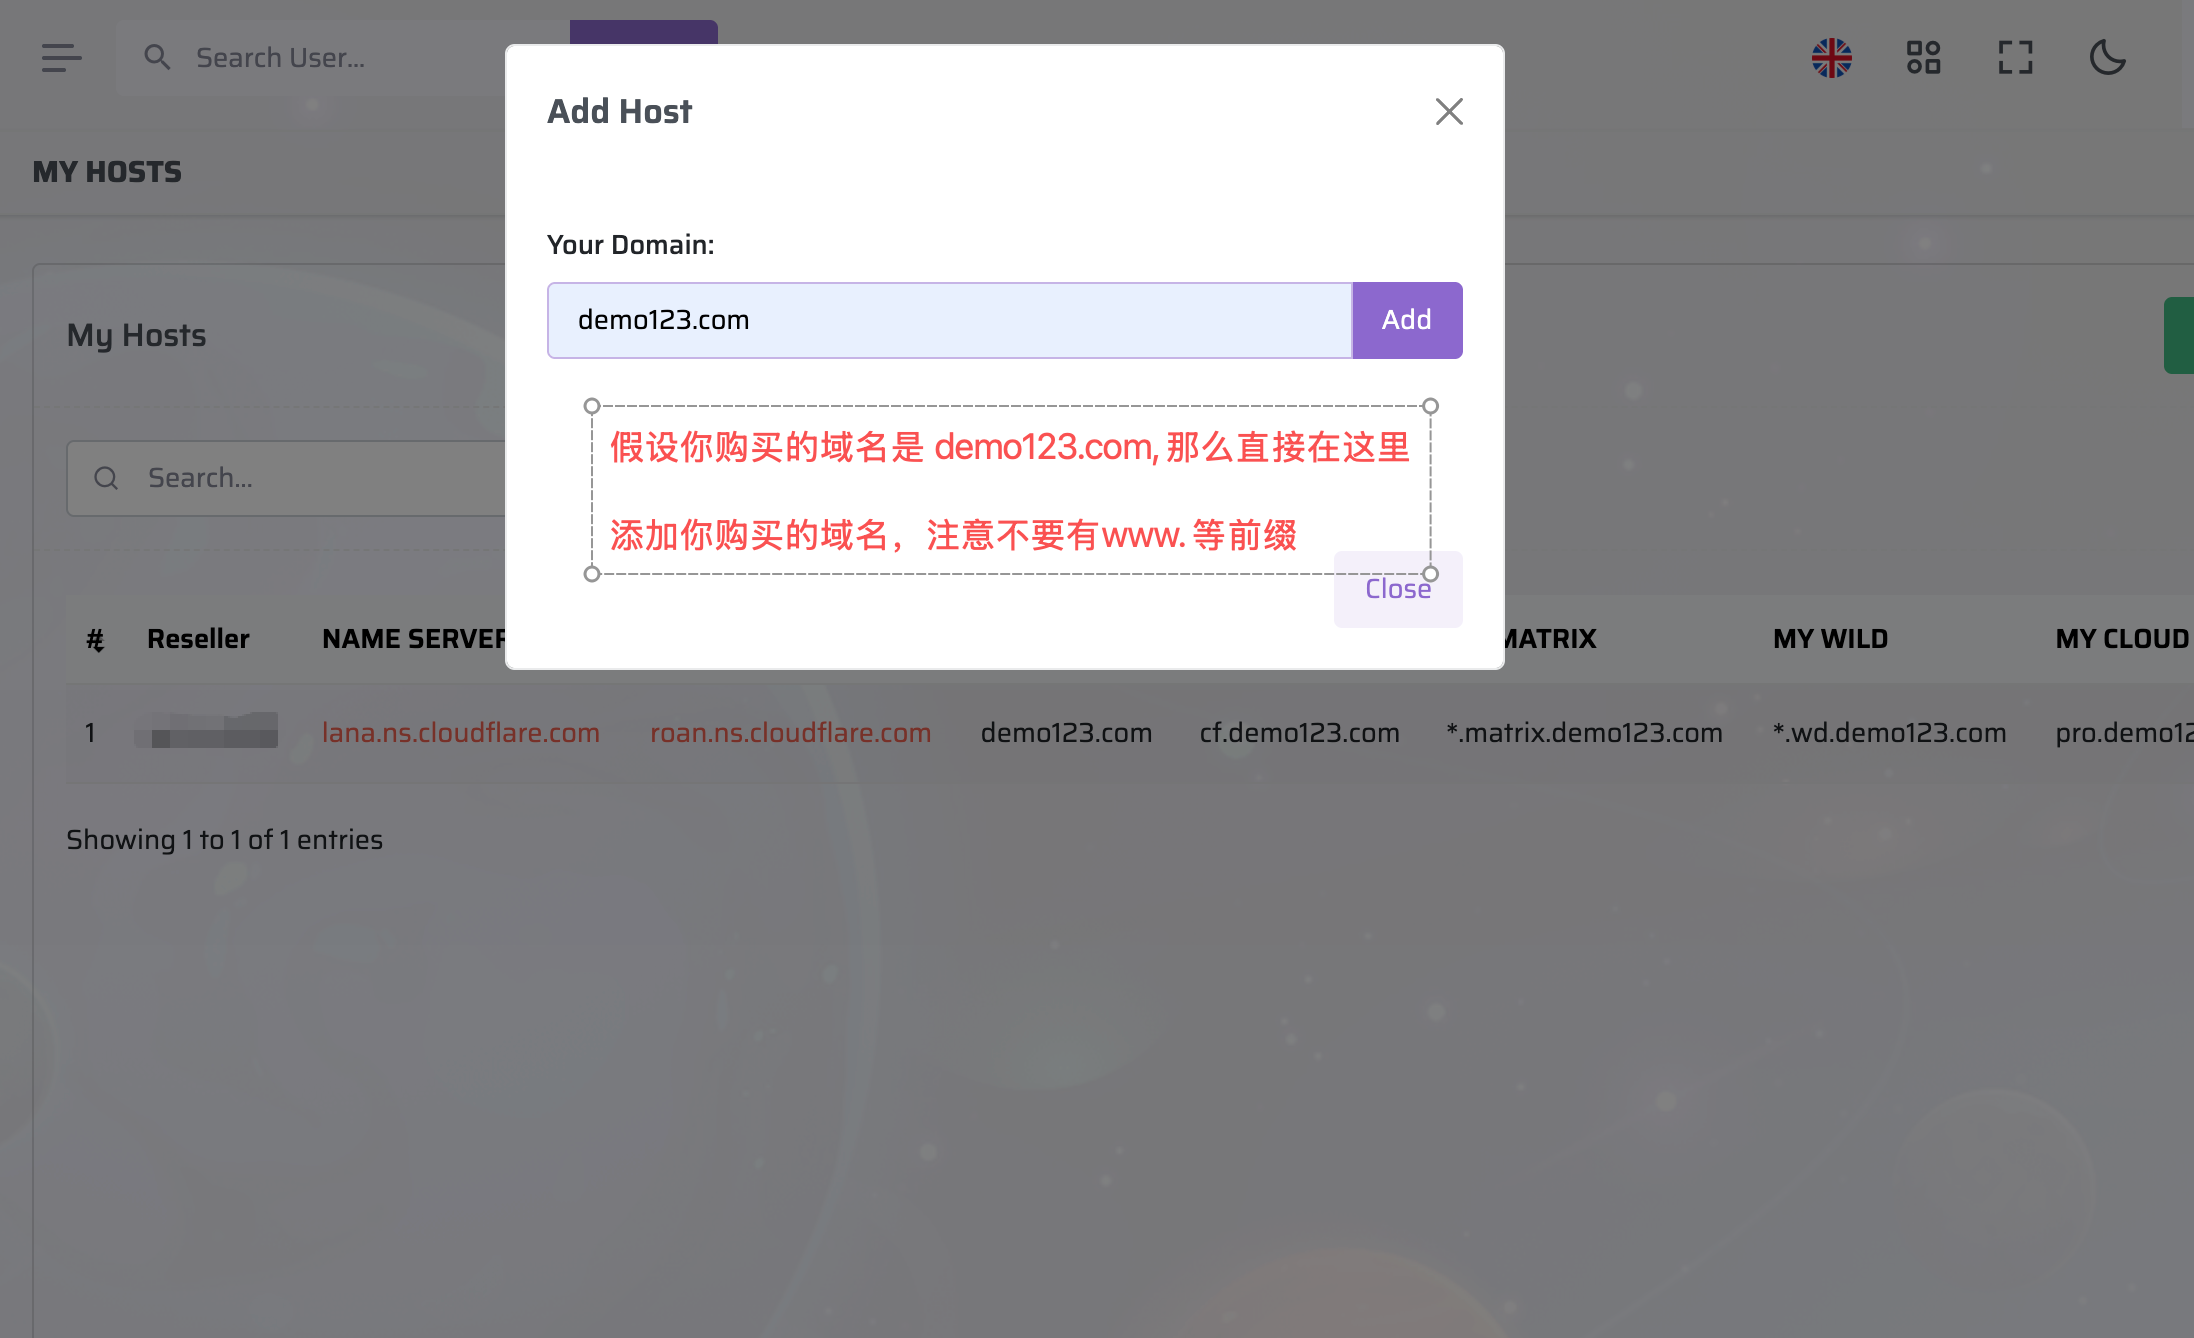
Click Add My Hosts, and enter the domain you purchased. Note: you must add the apex (root) domain without any prefix. For example, if you bought abc.com,
just add abc.com. Adding subdomains like www.abc.com or api.abc.com is incorrect.
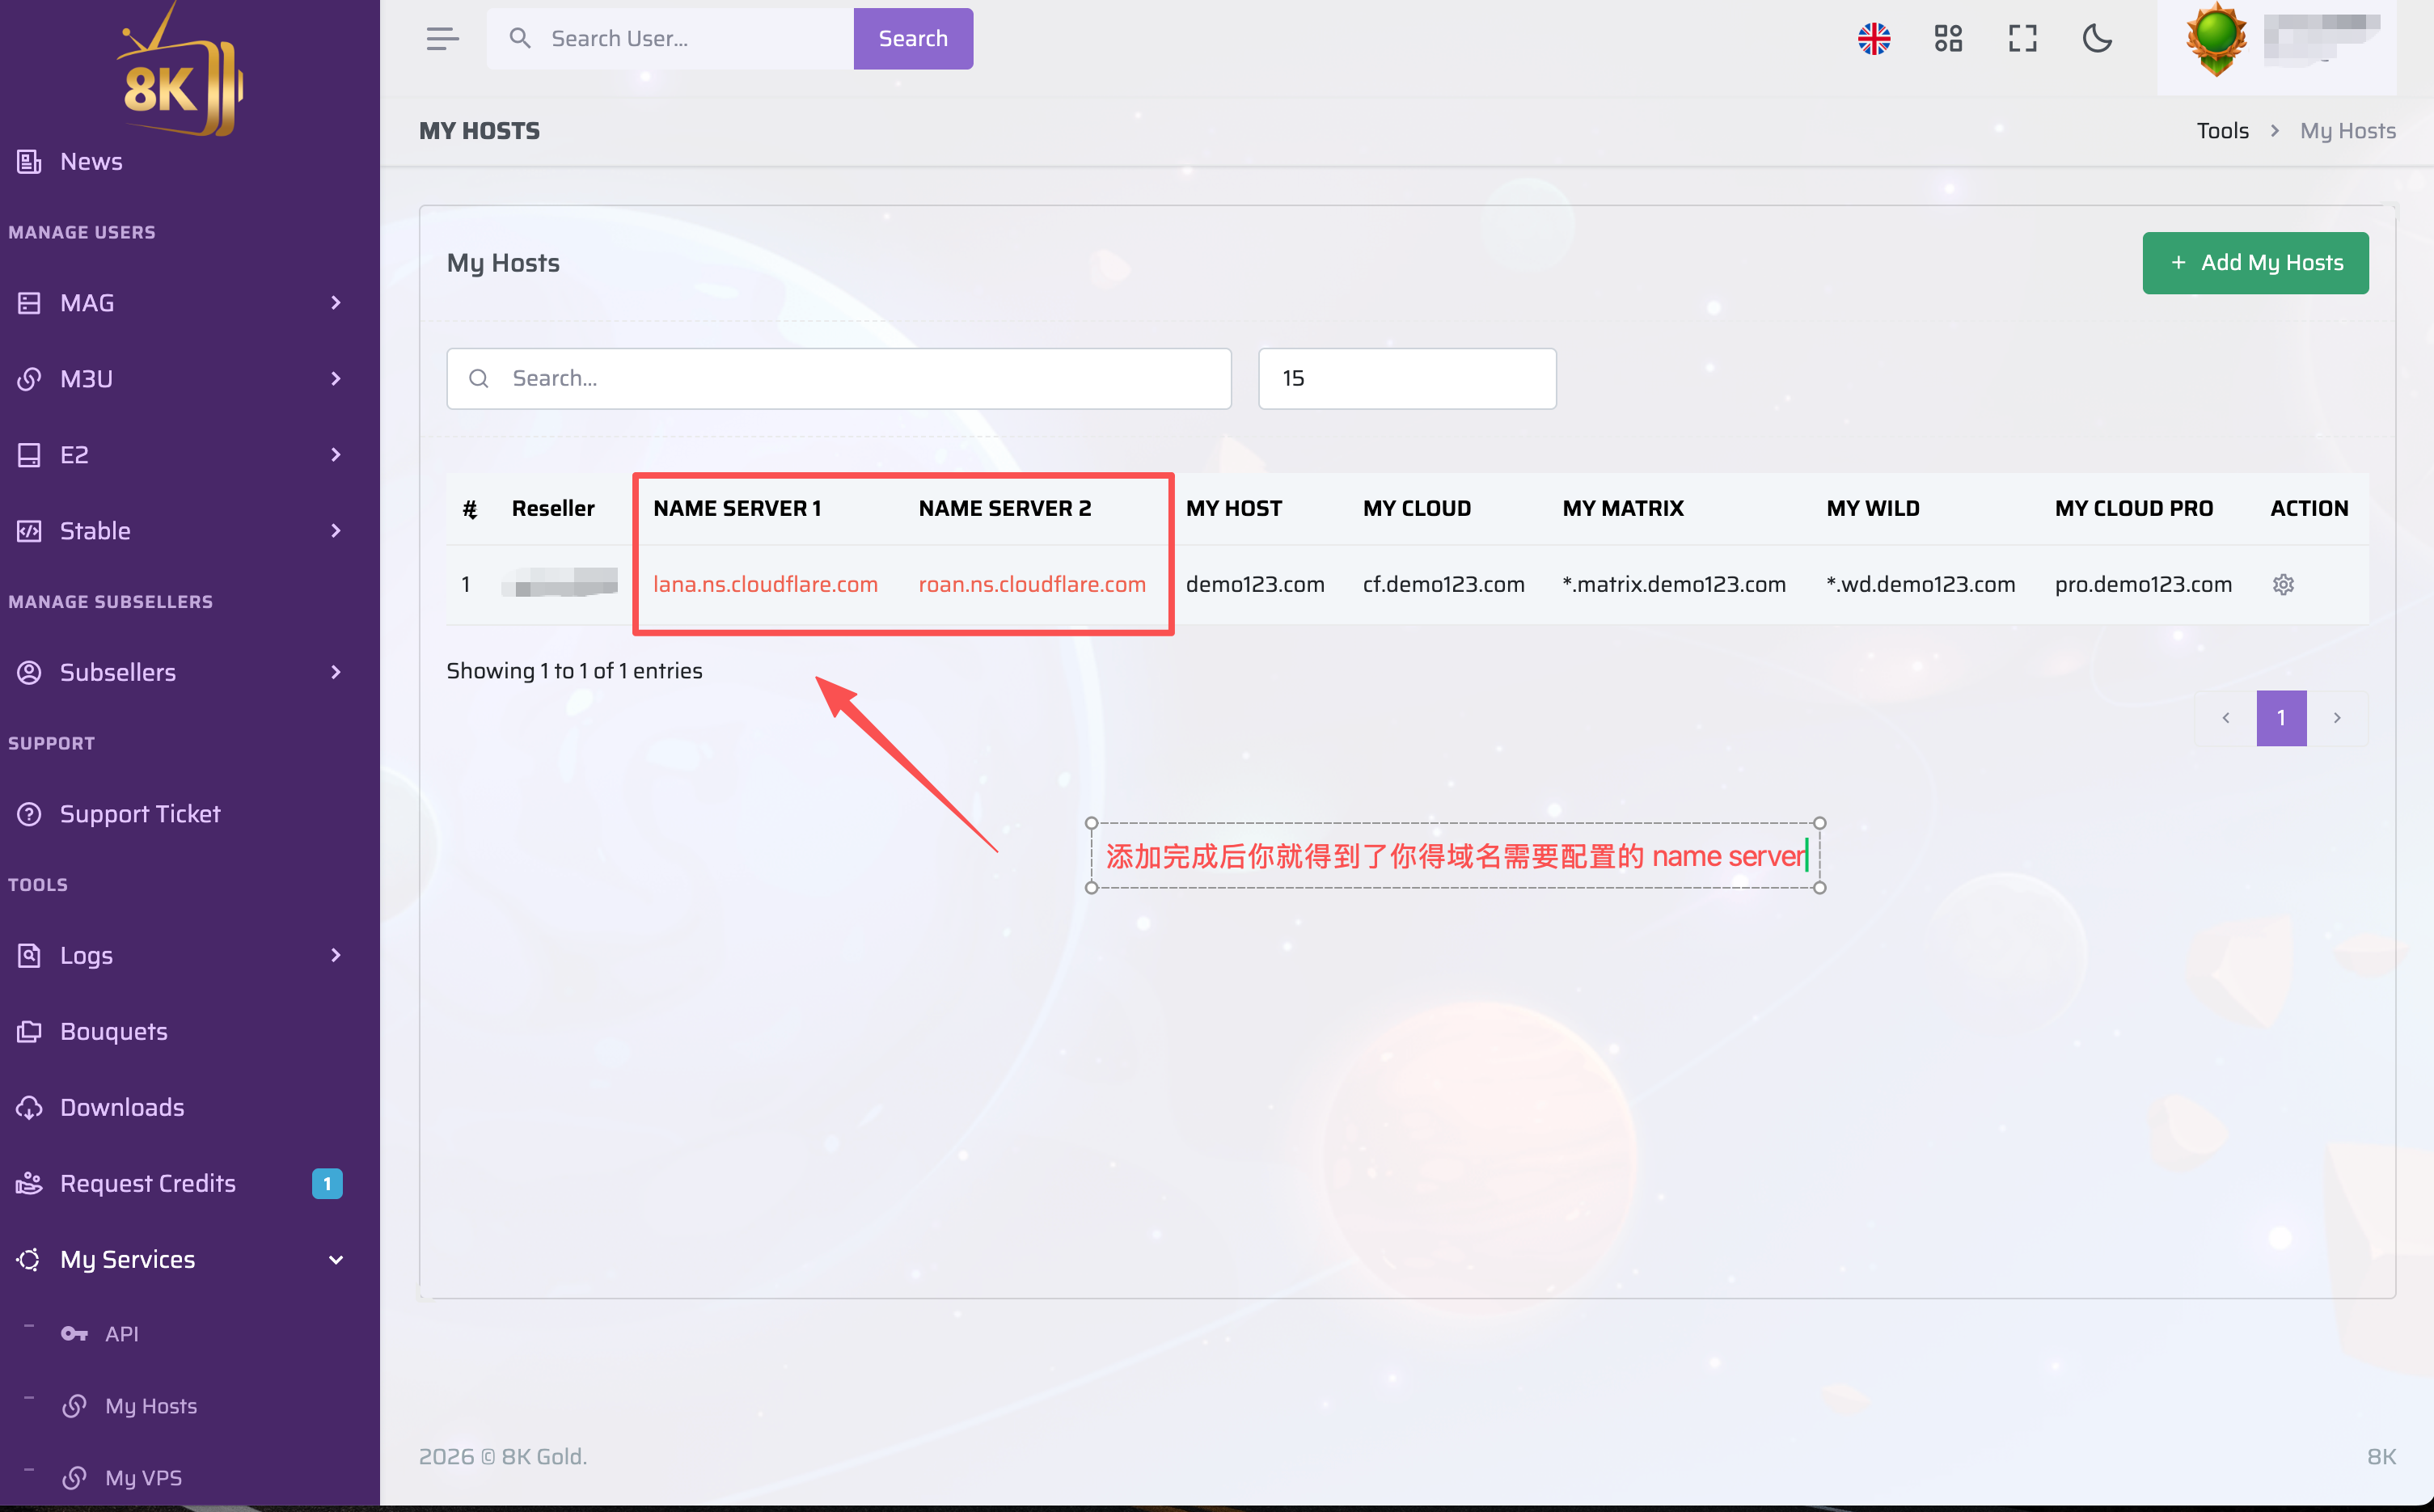
After filling it in, you'll get your own name servers, as shown above:
lana.ns.cloudflare.com
roan.ns.cloudflare.com
These are the name servers we need to configure. Go back to the backend of the domain you purchased and replace the registrar's default name servers with the new ones you just obtained.
Steps:
Using a domain bought on NameCheap as the example:
Click Domain List: Direct link
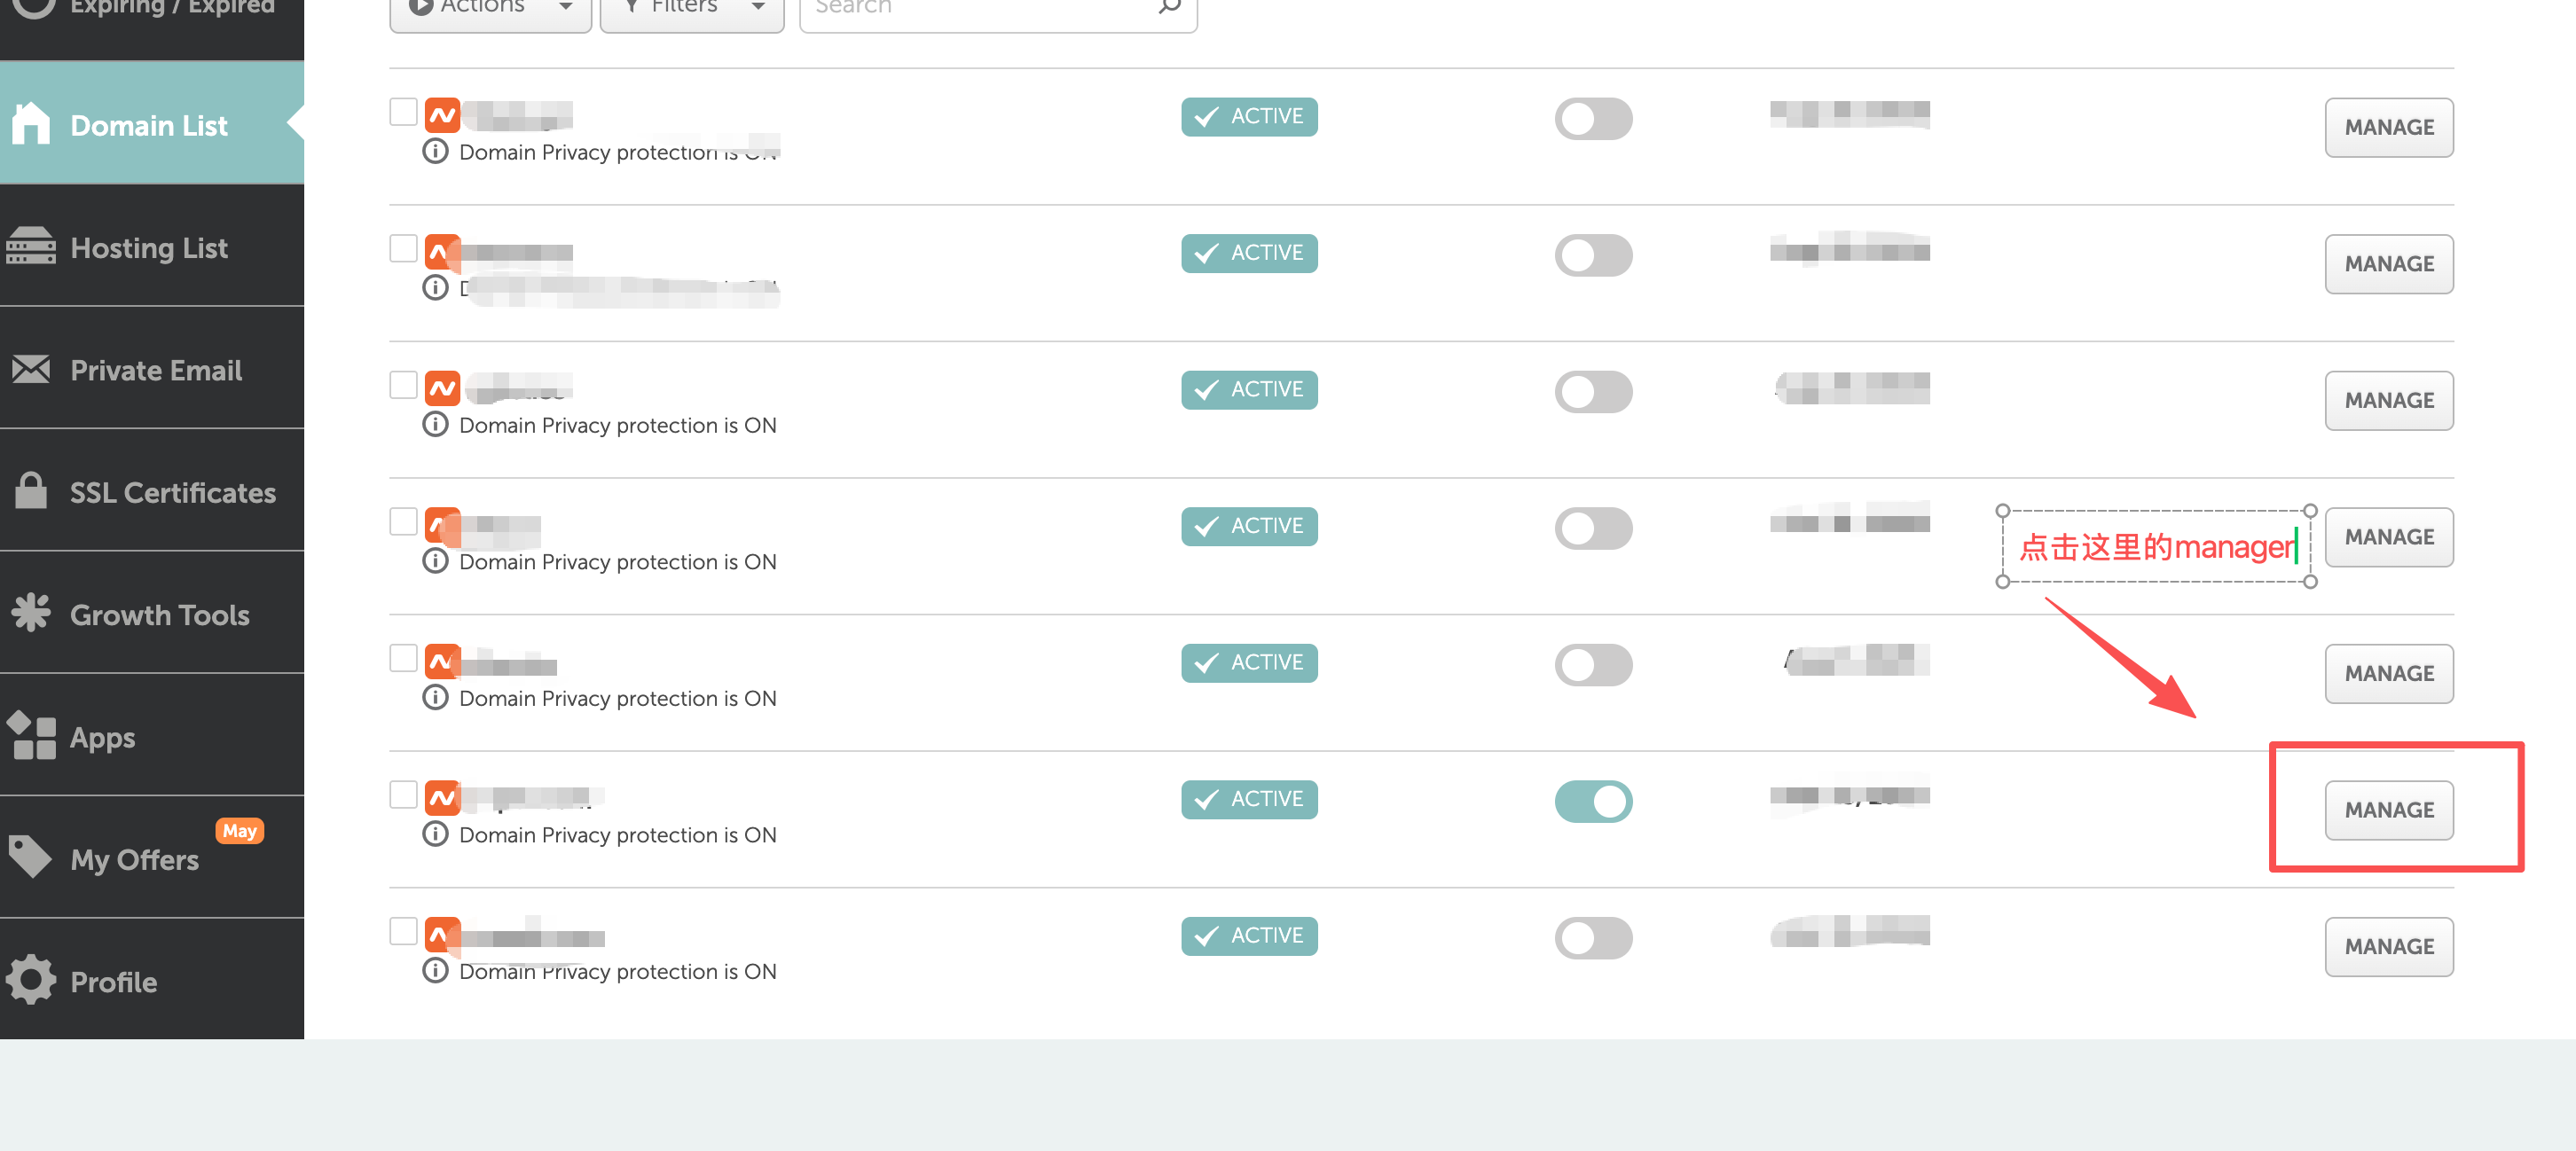
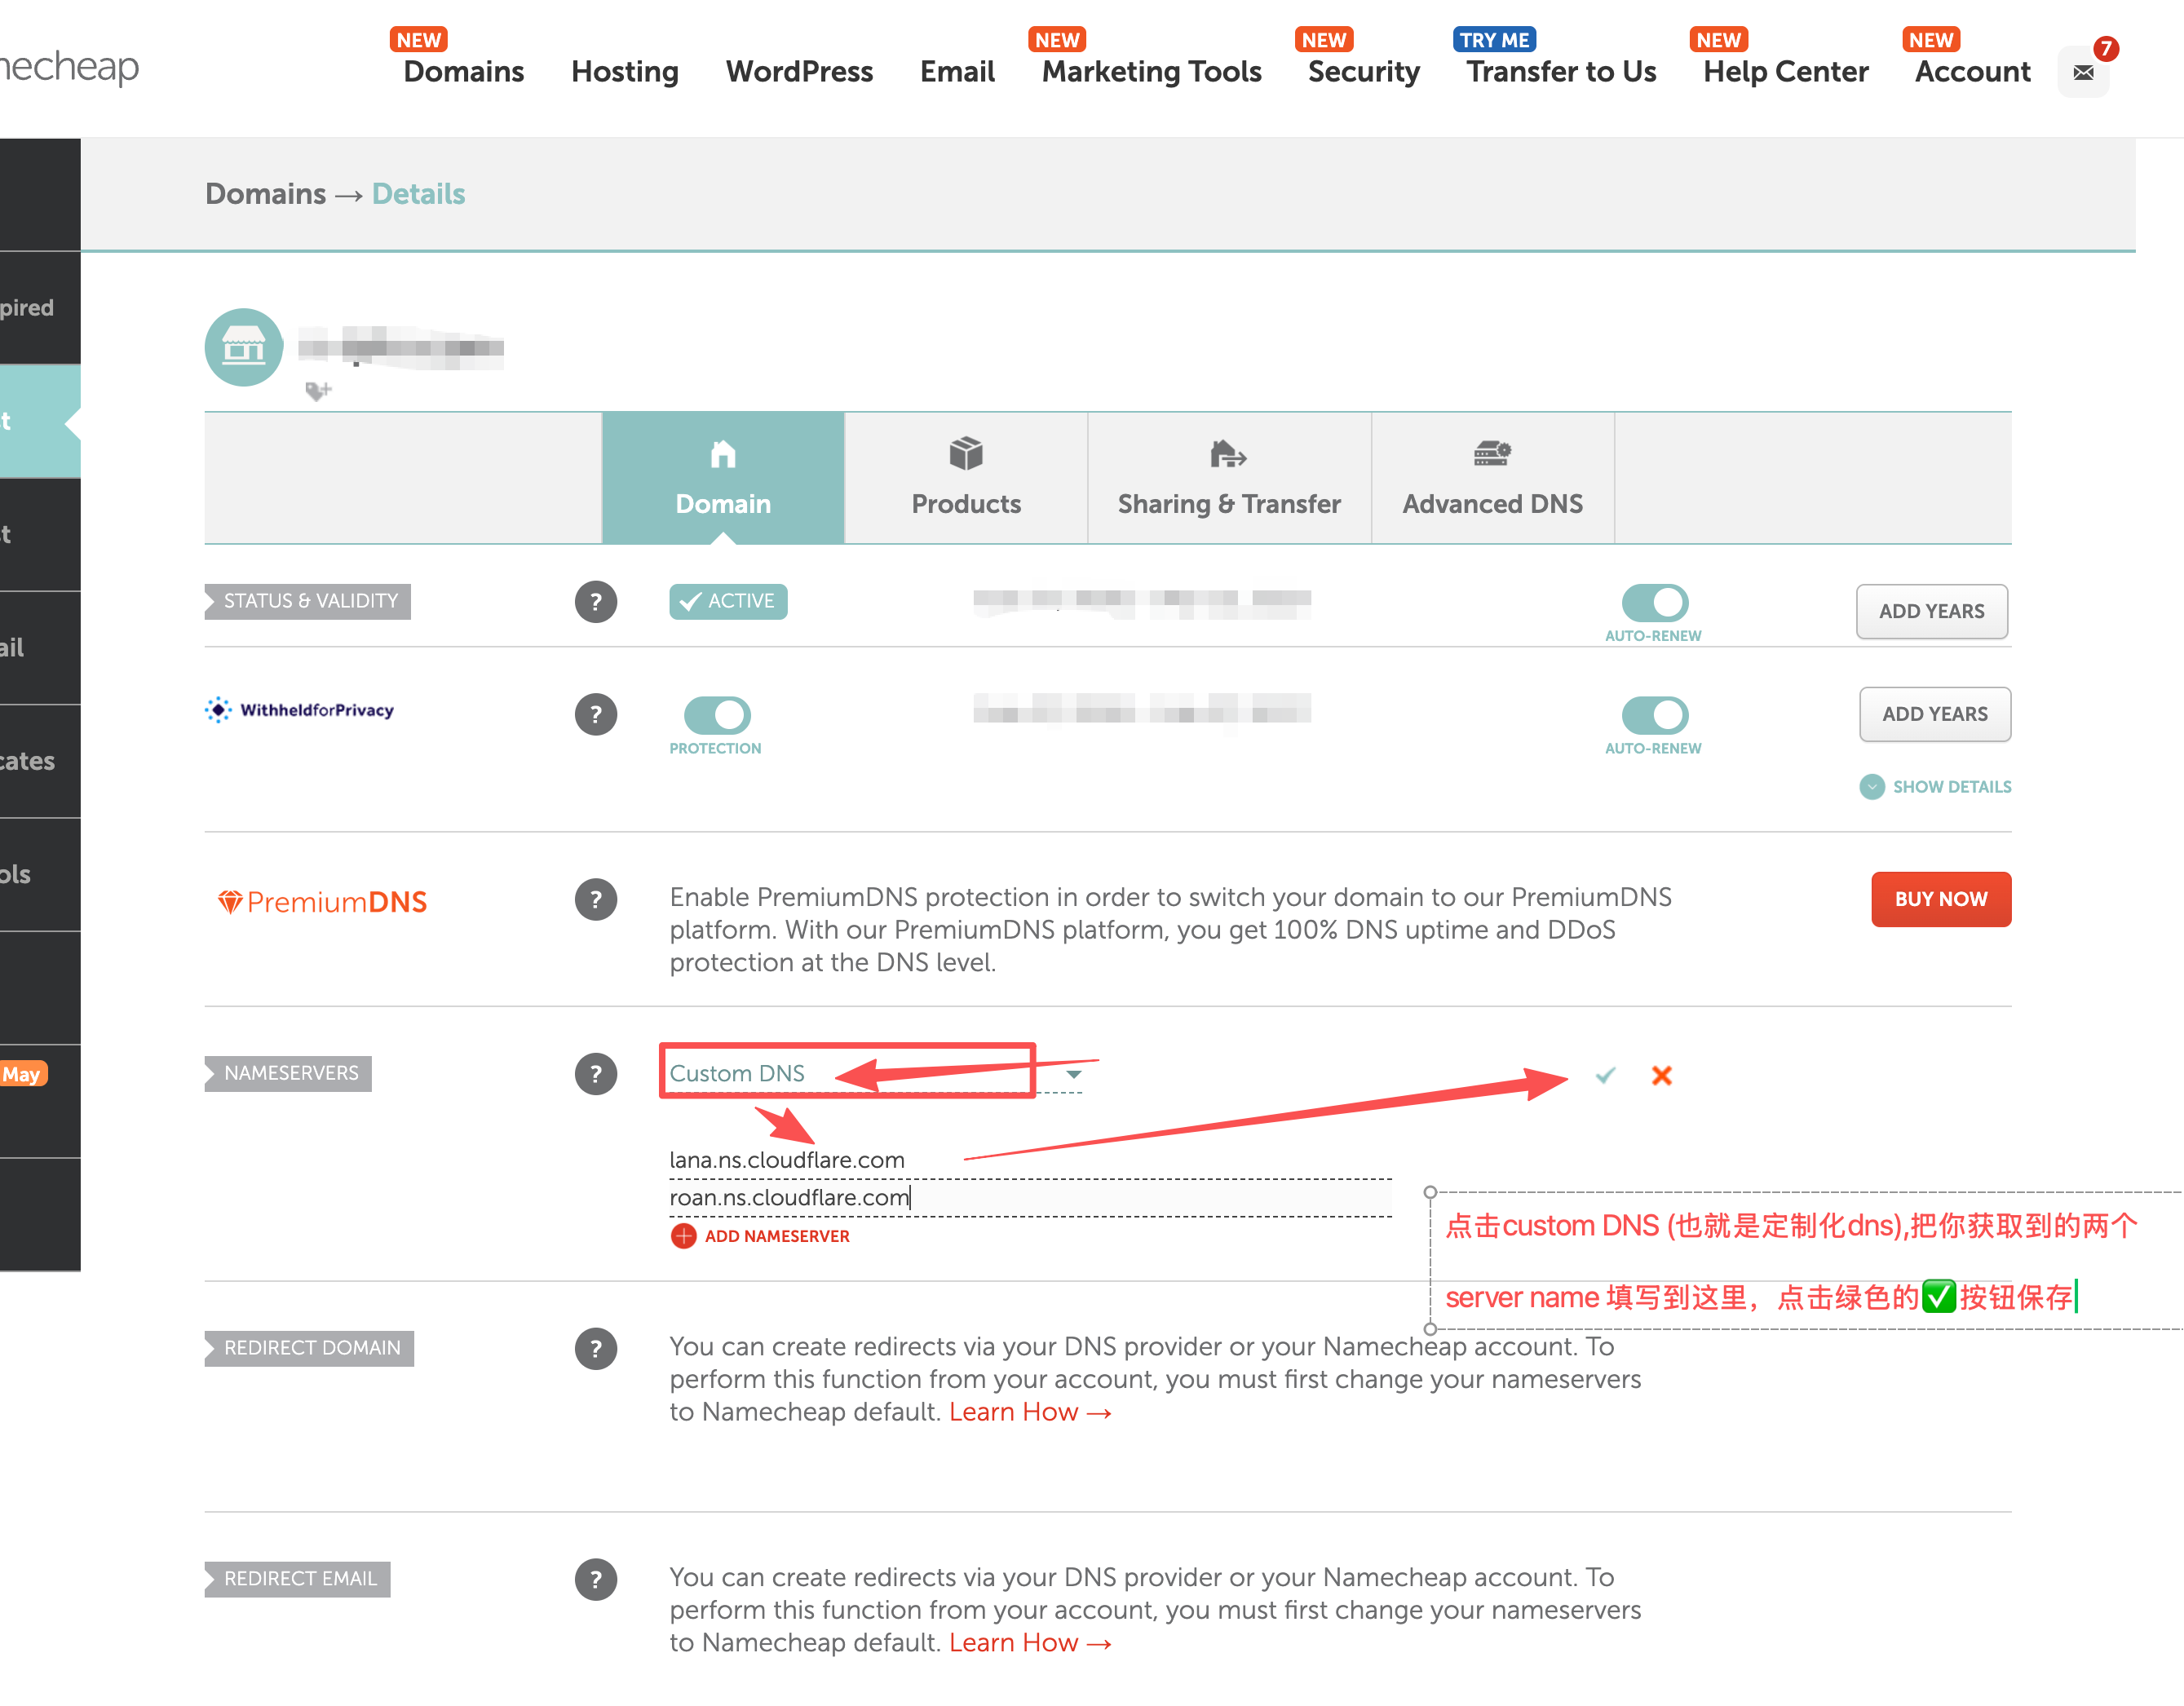
Click Manage to enter the domain settings page. Under the NAMESERVERS section, choose Custom DNS, fill in the name servers you obtained from the strong 8K panel backend, and click Save.
After saving, wait about 10–30 minutes for the DNS resolution to take effect. You can also check the strong 8K admin page — when the NAME SERVER and NAME SERVER 2 columns turn from red to green, resolution has taken effect.
Once resolution works, test it yourself: try to play a subscription using the credentials generated in the backend along with your own domain. If everything works, congratulations — your private domain is configured.
You can now use your own domain together with the backend-generated credentials to provide subscription services to your customers.
Related reading
One subscription to own it all, high definition 4K, fast loading, enjoy the good time of IPTV
No hidden consumption, all subscriptions can enjoy live TV, TV series, movies and other media, 58000+ movies, 16000+ TV channels and 17000+ TV series, watch as you like

Able IPTV
Best IPTV Provider
share:
Popular articles






Blog Directory
Related articles
Here are the articles you may need about IPTV
